Now or Never

I think it’s a case of now or never with this post! I finished this project quite a while ago now and another deadline has come and gone without me posting any finished pieces.
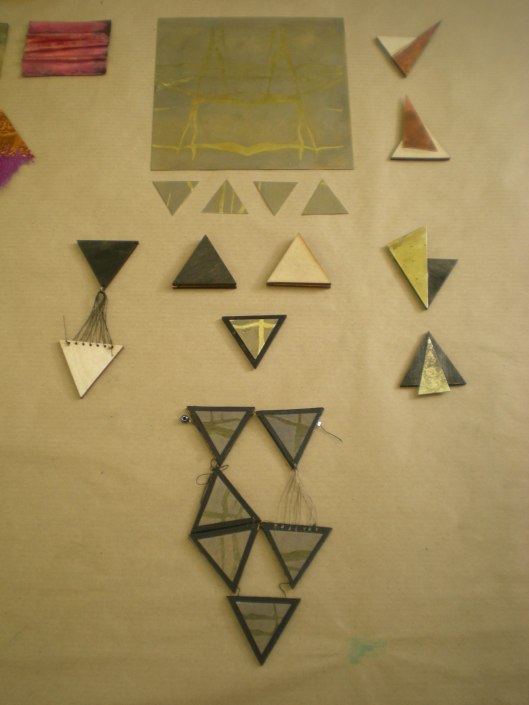
So here we go:IMG_3165In the end I made both objects and jewellery (there are two other pieces than these but I feel these are the most successful).IMG_3161IMG_3188
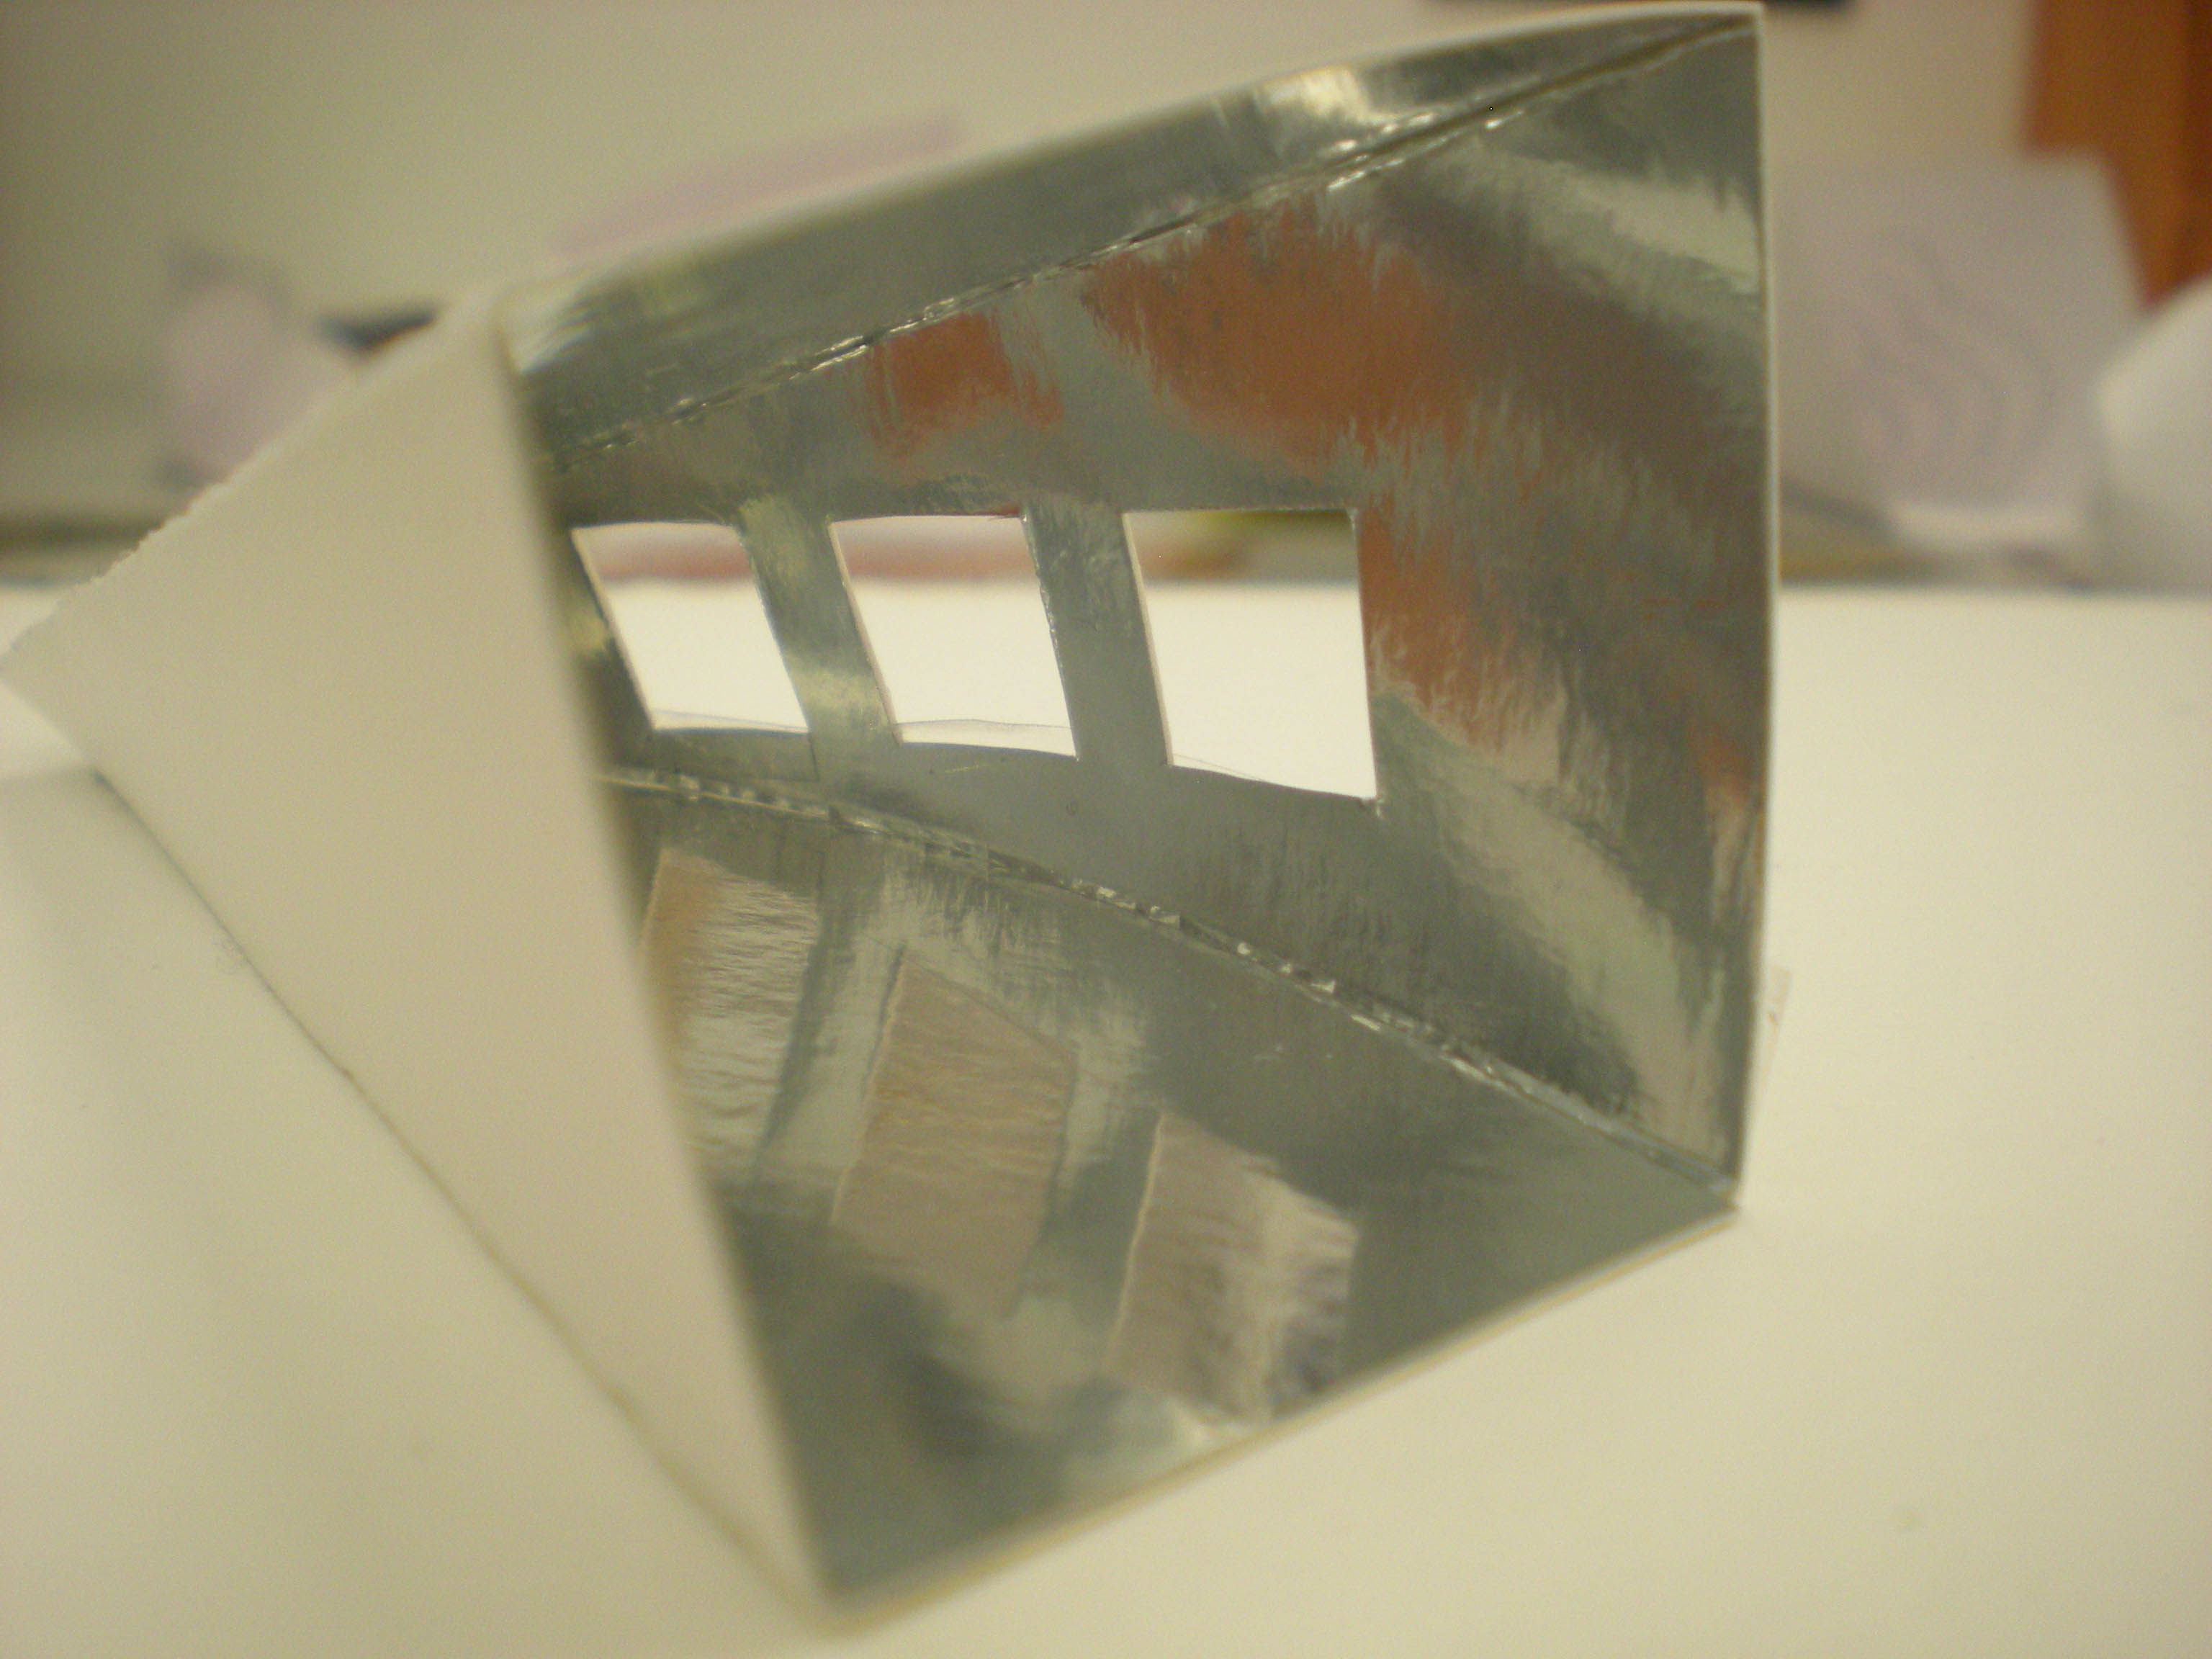
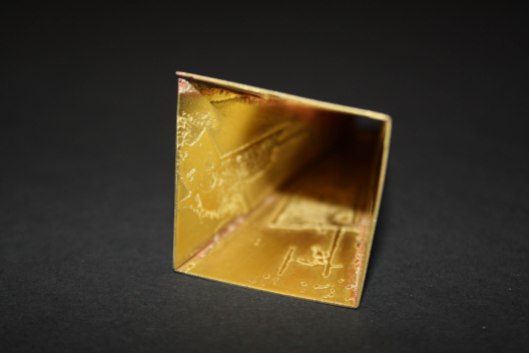
I am really pleased with these but working out the best way to make them was hell! If I’d had the time I would have liked to make more varied ‘corridors’ with steeper curves and different lengths of edges. I was also planning on blackening the insides of some.14IMG_3186IMG_3183IMG_3174
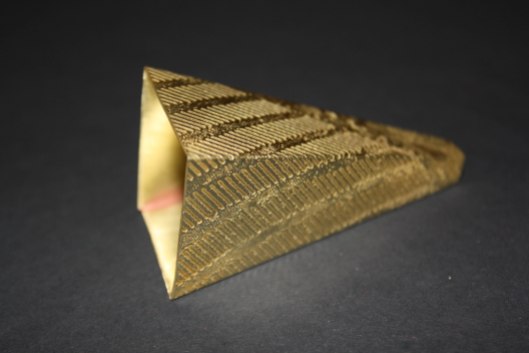
This is one of the necklaces, however it’s actually inspired by the bricks of MIMA rather than corridors. It’s simple but effective and I rather like wearing it myself.IMG_3215
After a very stressful finish to this project I managed to scrape a first! Woo!

Anyway, I’m off to Paris for a few days. I will try to be less useless once I’m back and post some examples from my Metal Folds project which finished earlier this week and will hopefully have my results for it as soon as I’m home.

Paper Jewellery

I decided not to use the optical illusion work as I prefer the subtlety of the previous work. However, I was still not sure exactly what I was making, at the time they were just art objects. I questioned myself on whether they needed to be something more. To work out if these little corridors could become jewellery I tried out some of my favourite paper pieces on chains as necklaces.IMG_3061IMG_3053The small ones are quite sweet, they could make interesting beads.IMG_3071I tried playing around with the positioning of the paper corridors on the chain, looking at how they might sit on the body. IMG_3110
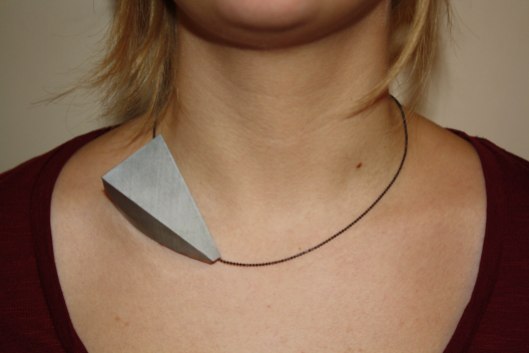
I felt that some of the pieces were a bit to large to be worn this way, they didn’t look quite right. Also, whilst they are in paper and therefore quite light, if I was to translate them into metal they may be a bit too heavy to be comfortable to wear. IMG_3122This one was particularly interesting with its steep curve and point. It works quite well as an asymmetrical neck piece.IMG_3123 IMG_3127After doing this I definitely think that some of the smaller ‘corridors’ could work very well as metal neck pieces, however, I am still interested in making some of the larger ones into art objects which are meant to be held, looked at and looked through.

Optical Illusions

Another idea I played with during my Gallery project was that of optical illusions. This was inspired by the illusions which can be seen in MIMA’s cafe. See the photos my dad took of these illusions here.DSCN0491I tried to incorporate the illusion of a circle within my corridor forms, although those forms became pyramids as I closed off the narrow end. I started by drawing the circles, working out how to change the curves to create the illusions, by eye.DSCN0493Soon after, I worked out how to create a net pattern on Photoshop to get a more accurate circle. Once I had this figured out I was able to change the shape and positioning of the illusion.

Oval:DSCN0585DSCN0592Off-centre circle:DSCN0658DSCN0661However, I then wanted to incorporate the earlier idea of curving one of the edges of the form but this proved much more difficult. I simply couldn’t work out how to alter the circle’s curves to accommodate for the curved edge and still create a perfect illusion of a circle. I attempted drawing it by hand (below) but gave up all together on Photoshop.DSCN0489DSCN0579Another aspect of these objects which proved tricky was photographing, or even seeing, the illusions. You have probably noticed that the illusions don’t actually seem to work in any of these photos but I promise that it is because they don’t photograph well. If you were to see them in reality you’d be able to tell that they do work, well, they do as long as you squint or hold them at a distance… haha. Maybe I’ve just been looking at them for too long!

Image and Reflection

My most recent project – the gallery one – actually came to an end over a week ago and I have even had my mark back awhile.

However, I have only done 2 posts about this project so far. Which is a pity as I have been really pleased with the work I have produced and the ideas I have been working with. Therefore, I am not going to post photos of my final work or tell you what mark I got just yet. I hope to post some more work that led to the projects conclusion first.

So, here are some more images of the paper pieces I made, experimenting with pattern and surfaces.
DSCN0368These were done using printed photos of the Mission’s interior. I like the subtle colour changes and how the folds change the intersecting lines of the images.DSCN0387DSCN0389DSCN0386
I then bought some Silver card (or mirror paper) to create reflections inside these corridor forms.DSCN0528I tried changing aspects to see how this changed the reflections. In this next one I used the mirror paper on only one side whilst colouring in the opposite section. This created the appearance of an extra two sides or, as I see it, a path.
DSCN0520Finally, I tried cutting out windows. This created a repeat pattern and obviously allowed more light inside the ‘corridor’.DSCN0523DSCN0524

Happy New Year

Well Happy New Year everyone! I hope you all had a great night last night as well as a fantastic Christmas.DSCN0393These are pictures of another of my paper ‘corridors’. Again it is inspired by John Pym’s installation “Penumbra” but with this one I have also focused on the iconic windows of Mission Gallery.DSCN0394 These ‘corridors’ are great for looking at from various angles, changing the perspective alters how they appear quite a lot.DSCN0397 I particularly like this one, I’m not sure why, but at least a part of it is the use of black paper. Although it is all black the windows allowing light through still create different shades and depth.DSCN0398

Paper Corridors

Wow! So far second year has been unbelievably busy (part of the reason for the lack of posts). I have been working on 3 projects and an essay, all running at once! Luckily one project and the essay are over and done with now and I got 82 on my essay, a fantastic mark, giving me a first. Yay!

My main brief at the moment is to design and make a collection of work based on a specific museum or gallery of our choice. The idea is that the products we create would be sold in the shop of the museum or gallery.

I have chosen two galleries to base my work upon; Mission Gallery and MIMA.
I have been making lots of paper objects based on aspects of both galleries. These first ones were inspired by Mission Gallery’s building and the John Pym exhibition ‘Penumbra‘.
DSCN0498

With these I was creating miniature corridors, joining curved and straight edges, and playing with ideas of perception of space, sense of depth and light and shadow.DSCN0499DSCN0504DSCN0507DSCN0508DSCN0511

Result!

Just two days ago I was moving out of my student house in Hereford. It’s hard to believe my first year has finished!

Since returning home I have received a letter confirming my results. For my final project, the work below, I received 80! A very good 1st.
DSCN9658
DSCN9660DSCN9665
Obviously I am very pleased with my result but, although the project itself was very successful, I will admit I was a little disappointed that the actual final necklace wasn’t completely successful. You can see this below.
DSCN9662
Having said that I still think elements of it are very effective and the initial design very clever.

My overall mark for the whole year is 1st. Yay!

Necklace Designs

Today I finished my final necklace for my current project. The deadline is this Friday and I still have a bit of book work to do but it is a big relief to have the final outcome over and done with!
Before I present the final piece I want to show some of the journey towards my final design with some of my ideas in my sketchbook.
IMG_2747IMG_2748IMG_2749IMG_2750IMG_2746

Rocky Patterns and Etched Brass

I’ve been very busy since returning from Scotland. So I am very sorry for taking so long to post again.

Whilst in Scotland I collected rocks which interested me and I have done drawings of the patterns in the rocks. I am hoping to use these patterns within the necklace design I have been working on (which I will show you in the next post).
IMG_2757
IMG_2758IMG_2759IMG_2760
I haven’t decided what material I am going to make my necklace out of yet however there are many ways in which I can apply these patterns. One way is to etch it onto metal.
IMG_2741
I chose one of my drawings to etch. I repeated and flipped the pattern and printed it onto acetate to transfer it onto the metal which was then placed into acid. This etched the pattern into the metal. I chose brass because it looks good with wood which I am considering combining it with.
IMG_2742
This was quite a large design so it hasn’t etched very deep. However it is still quite effective, especially when the light catches the pattern.
IMG_2743

Paper Landscapes

IMG_9680IMG_9678IMG_9673IMG_9672IMG_9675IMG_9679
ALL of these photos are of the same piece of paper – smaller than A4!
It is fascinating how different it appears when photographed from different angles – sometimes as zigzagging steps or as dramatic geometrical drawings or even sometimes as little landscapes, like sand dunes.